
Beginner’s Guide to Vape Coil Replacement
Vaping is an enjoyable hobby for many, but like any device, your vape needs maintenance. One essential task every vaper should know is how to change vape coil. This part directly impacts your vaping experience. A worn-out coil can cause bad taste, less vapor, or even leaking. Fortunately, replacing a vape coil is simple once you understand the process. This beginner’s guide will walk you through everything you need to know to keep your device in top shape.
Why Is Changing Your Vape Coil Important?
Your vape coil is the heart of the device. It heats up the e-liquid and turns it into vapor. Over time, coils get dirty or burnt out, affecting the flavor and vapor production. Ignoring coil replacement can lead to:
- A burnt or unpleasant taste
- Reduced vapor output
- Leakage and spit-back
- Damage to the vape tank
Knowing when and how to change your vape coil keeps your vaping smooth and satisfying. Plus, it prolongs your device’s life.
Signs It’s Time to Change Your Vape Coil
Recognizing when to change your vape coil can save you from a frustrating experience. Here are some clear signs to watch for:
Burnt Taste
If your vape suddenly tastes harsh, burnt, or metallic, it’s likely the coil is burnt out. This is the most obvious signal.
Reduced Vapor Production
When the vapor clouds get smaller and less dense, the coil might be failing.
Gurgling Sounds or Leaks
Old coils can cause flooding inside the tank, leading to gurgling noises or liquid leaking from the airflow holes.
Dark or Discolored Coil
If you disassemble your tank and see the coil is dark, blackened, or crusty, it needs replacement.
How Often Should You Change Your Vape Coil?
Coil life depends on various factors such as:
- The type of e-liquid (sweet or high VG e-liquids tend to gunk coils faster)
- Wattage settings on your device
- How frequently you vape
On average, coils last between one to two weeks. Some vapers replace coils sooner for the best flavor, while others wait until signs of degradation. Always listen to your device and taste buds.
Guide to Change Vape Coil
Changing your vape coil is a straightforward task, even for beginners. Follow these steps carefully to ensure the best results.
Prepare Your Workspace
Make sure you have a clean, flat surface. Gather your spare coil, vape device, and a paper towel for any spills.
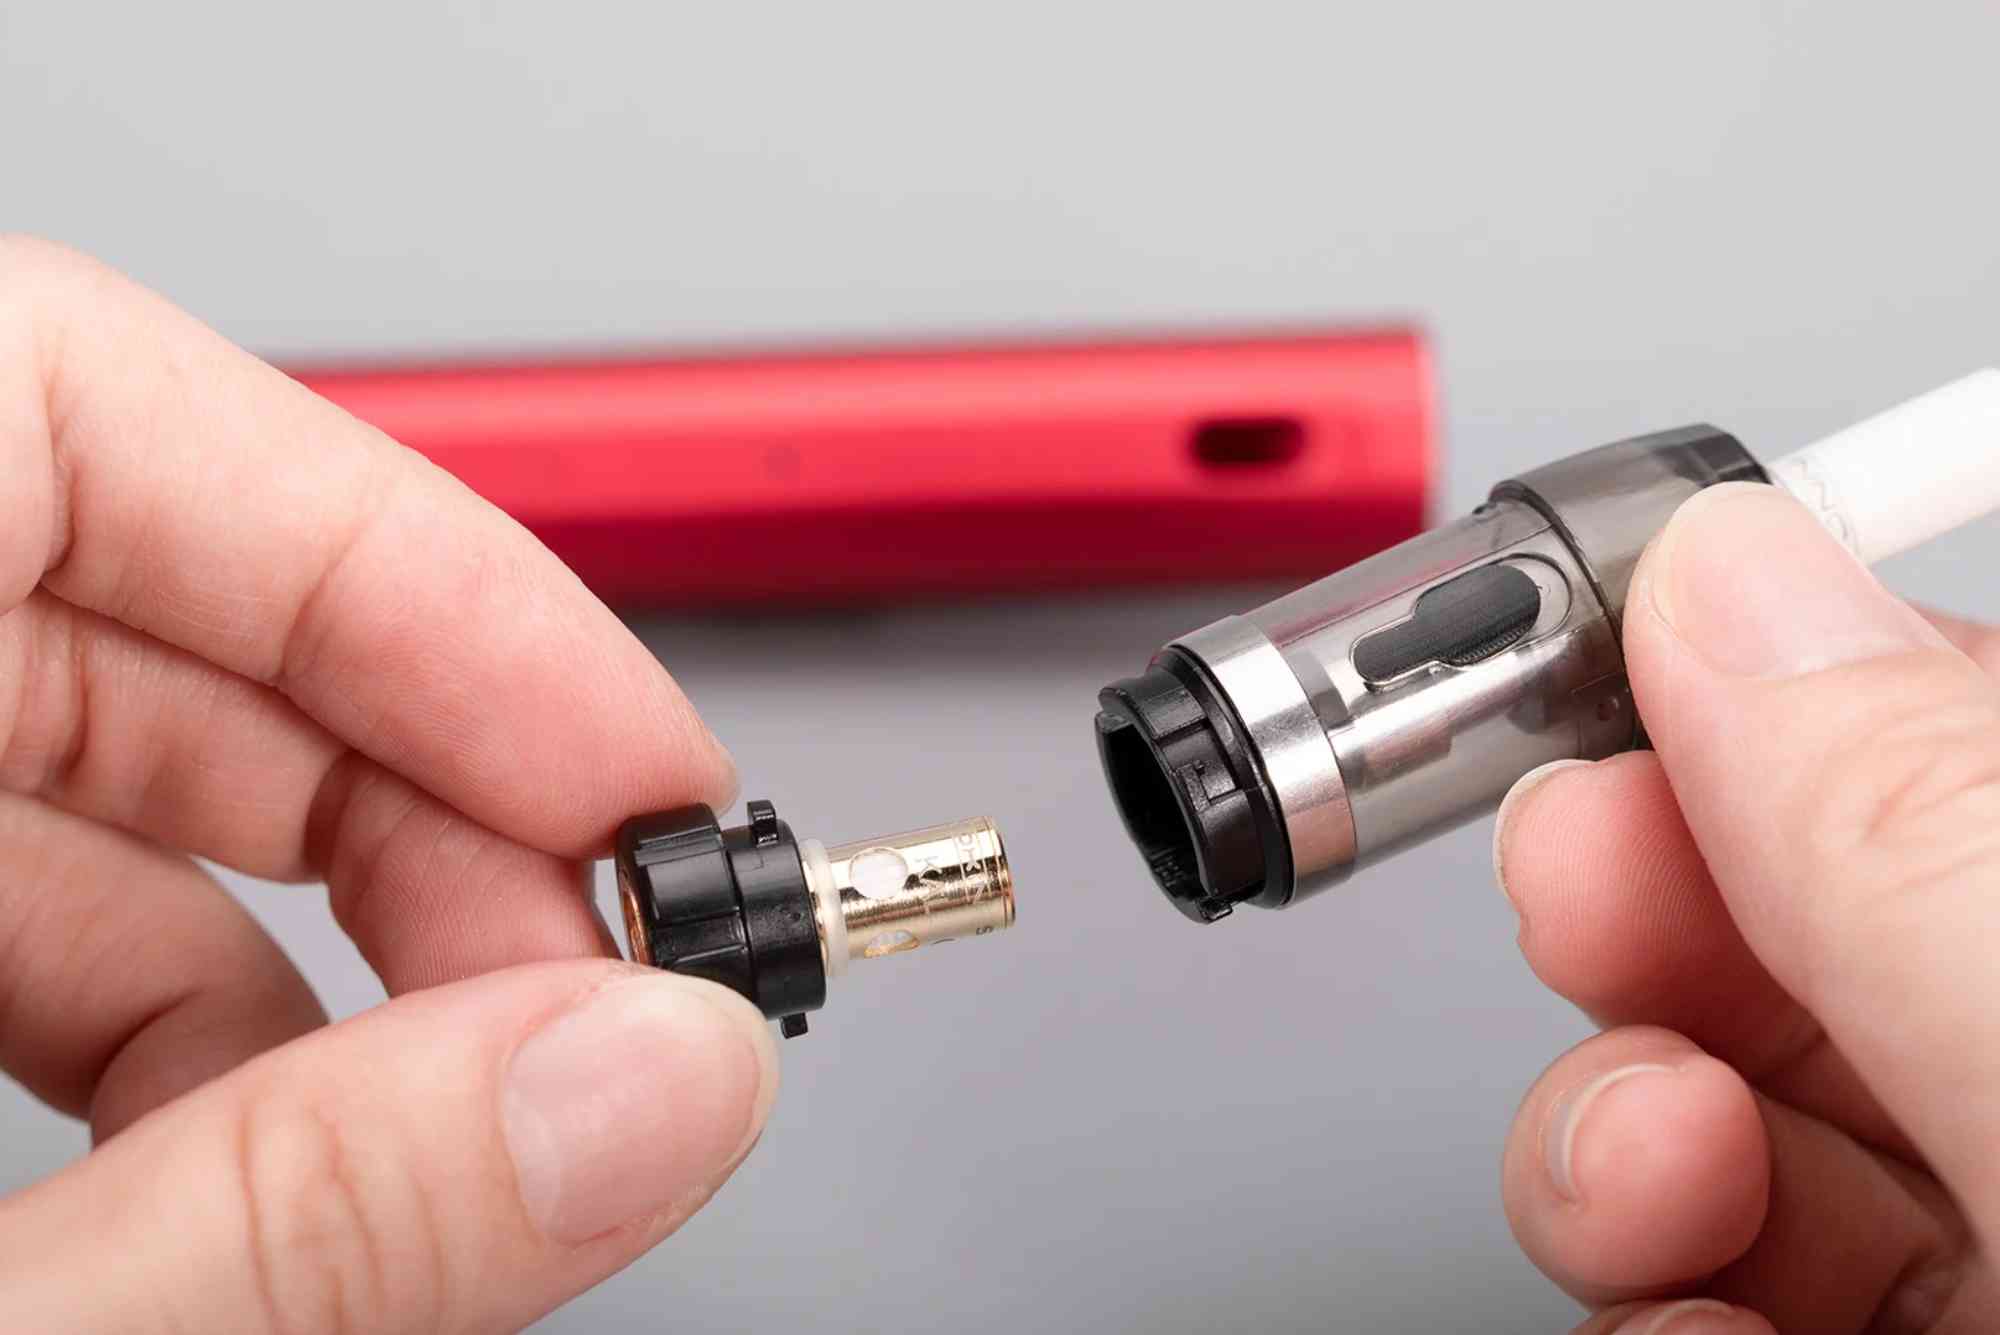
Disassemble Your Vape Tank
Unscrew the tank from the vape device. Then, carefully unscrew the base of the tank to access the coil.
Remove the Old Coil
Unscrew the old coil from the base. It might be a little tight, so gently twist and pull it out.
Prime the New Coil
Priming means adding a few drops of e-liquid directly onto the cotton of the new coil. This prevents dry hits and extends coil life.
Install the New Coil
Screw the new coil firmly into the base of the tank. Avoid overtightening as it may damage the threads.
Reassemble the Tank
Put the tank back together carefully. Fill it with your e-liquid and screw the tank back onto your vape device.
Let the Coil Soak
Before vaping, allow the coil to soak in the e-liquid for about 5 to 10 minutes. This lets the cotton fully absorb the juice, preventing burns.
Adjust Your Settings
If your device has adjustable wattage, start low and slowly increase to the recommended wattage for your coil. This helps prevent coil damage.
Tips to Extend Your Vape Coil’s Life
While replacing coils is necessary, some practices can help your coil last longer:
- Avoid chain vaping; take breaks between puffs to allow the coil to cool
- Use e-liquids with lower sweetener content as sugary juices can gunk coils
- Keep your wattage within the coil’s recommended range
- Store your vape upright to prevent flooding
- Regularly clean your tank when changing coils
Common Mistakes to Avoid When Changing Vape Coil
Even simple tasks can go wrong if you’re not careful. Watch out for these errors:
- Not priming the coil before use, leading to dry hits
- Over-tightening the coil and damaging the threads
- Using old coils for too long, causing bad flavor and poor performance
- Filling the tank immediately after coil installation without soaking
- Not adjusting wattage for a new coil
Avoid these, and your vaping will be much smoother.
Master the Change Vape Coil Process Today
Learning how to change vape coil properly is a game changer for your vaping experience. It’s quick, easy, and improves your flavor and vapor quality. Plus, it keeps your device running longer and prevents damage. Remember to look out for signs like burnt taste and low vapor, prime your new coil, and adjust your settings carefully.
Ready to upgrade your vaping routine? Start changing your coils regularly and enjoy the full flavor and vapor your device can offer.
Frequently Asked Questions
How often should I change my vape coil?
Most vapers replace coils every 1-2 weeks, but it depends on your usage and e-liquid type.
Can I reuse a vape coil?
Reusing coils can lead to poor flavor and a burnt taste. It’s best to replace them once they degrade.
How do I know if my coil is burnt?
A burnt coil produces harsh, unpleasant taste and reduced vapor.
Do I need to prime my new coil?
Yes, priming prevents dry hits by saturating the cotton with e-liquid before vaping.
What happens if I don’t change my coil?
Using an old coil can cause leaks, bad taste, and damage your tank or battery.


